The 1200D or Rebel T5 is the next model after Canon 1100D T3 and offers not only a bigger LCD screen but also more mega pixels.
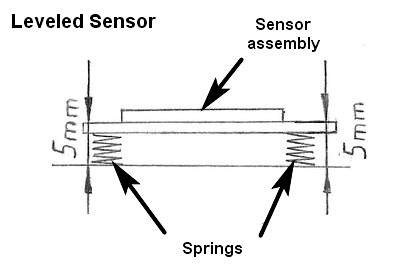
Difference is and inside the sensor mount. Now the sensor is fitted on springs and not sitting on shims like in the previous model.
Is the astro mod now difficult? The answer is yes, it needs a tool for sensor adjustment.
Because we can’t use shims to adjust the sensor we will be using a gauge, a caliper or any other tool that can measure a distance between our sensor and camera chassis.
Please note that adjusting the sensor is not critical. Important is at least to make it level preferably the way it came from the factory.
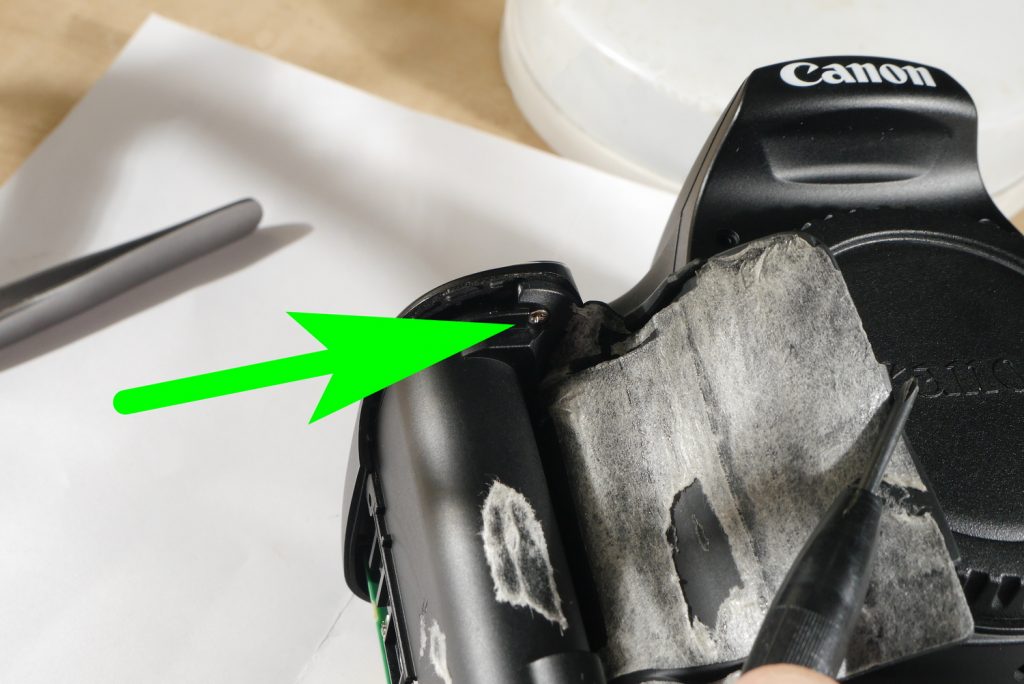
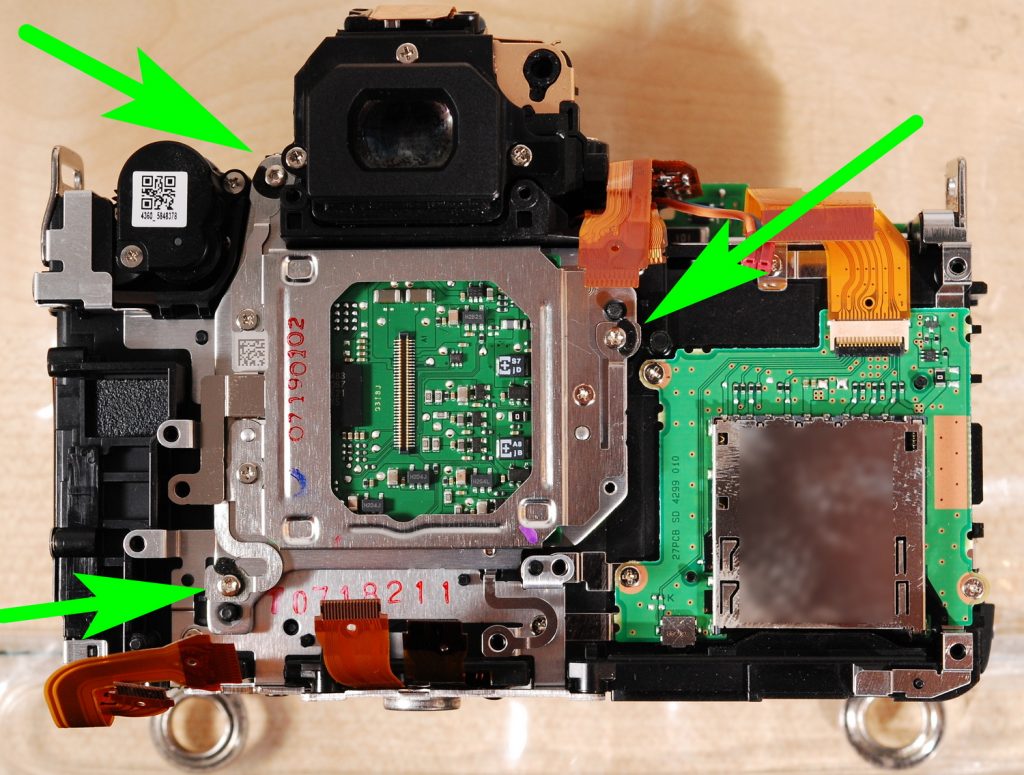
The disassembly is straight forward. There is just one hidden screw that we must unscrew to separate camera casing from the chassis.
All outside screws are same length and type so no worries if they got mixed.
There are just different screws for logic board and for the sensor.
The idea is to take out the second filter that is on the sensor and leave the first filter as is. The first filter passes a bit more infrared including 656 nm which we actually want to have in our astro pictures.
Contents
Dealing with sensor leveling
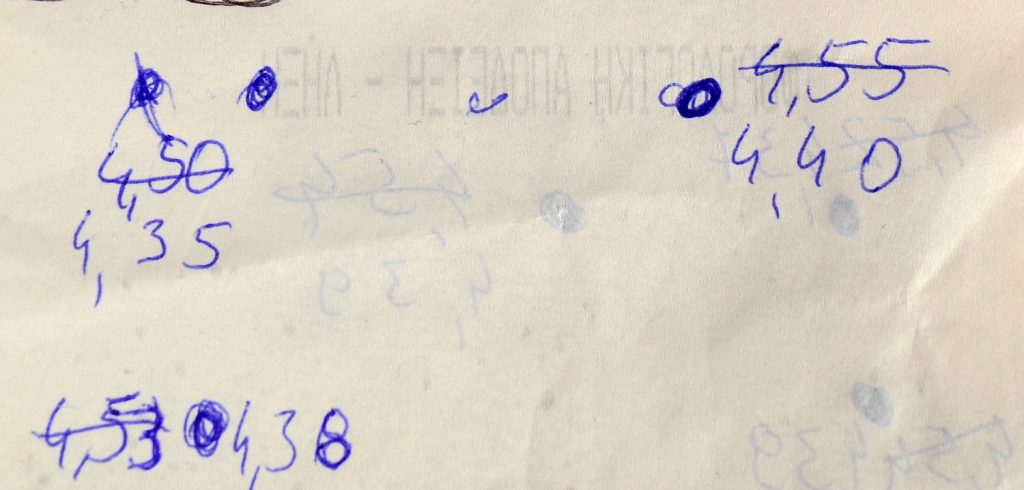
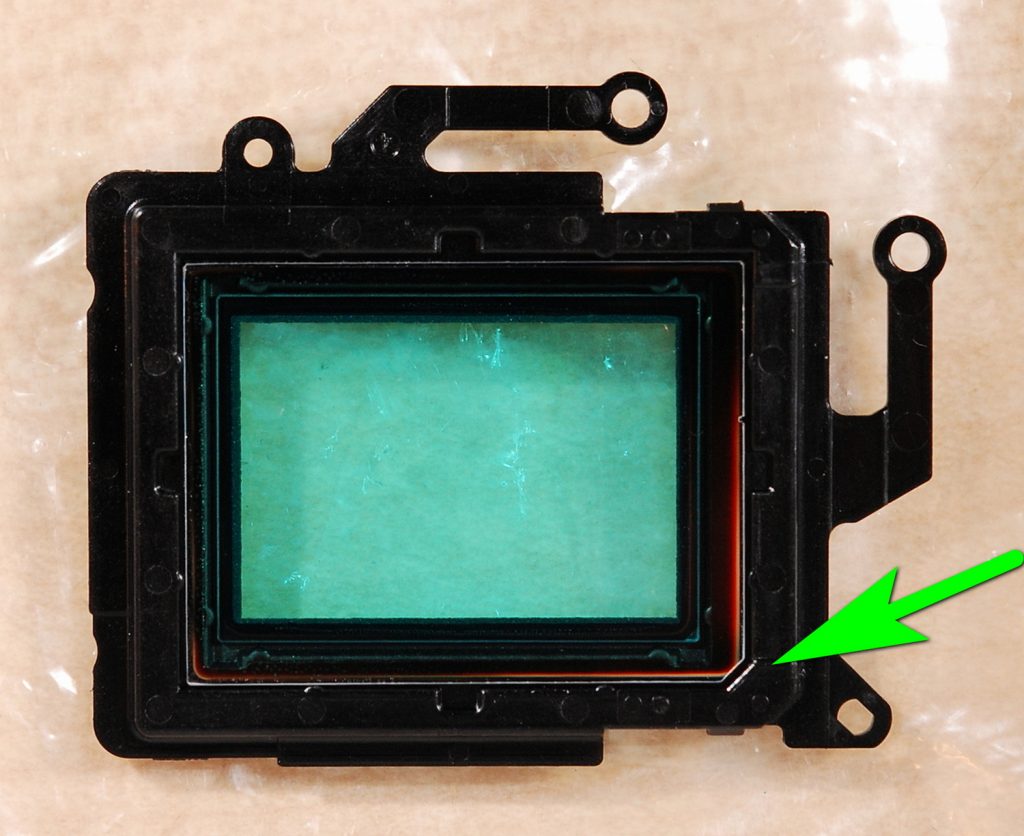
After removing the logic board we need to measure three distances. Those are next to the three sensor screws.
I will use here a gauge. It’s a simple heavy metal base and a gauge that has a magnetic base.

Important thing is to keep the gauge as is during disassembly and assembly as if we move it since the measurement will differ.
Let’s take the three readings and write it on a paper.
This is it. We now can take out the sensor.
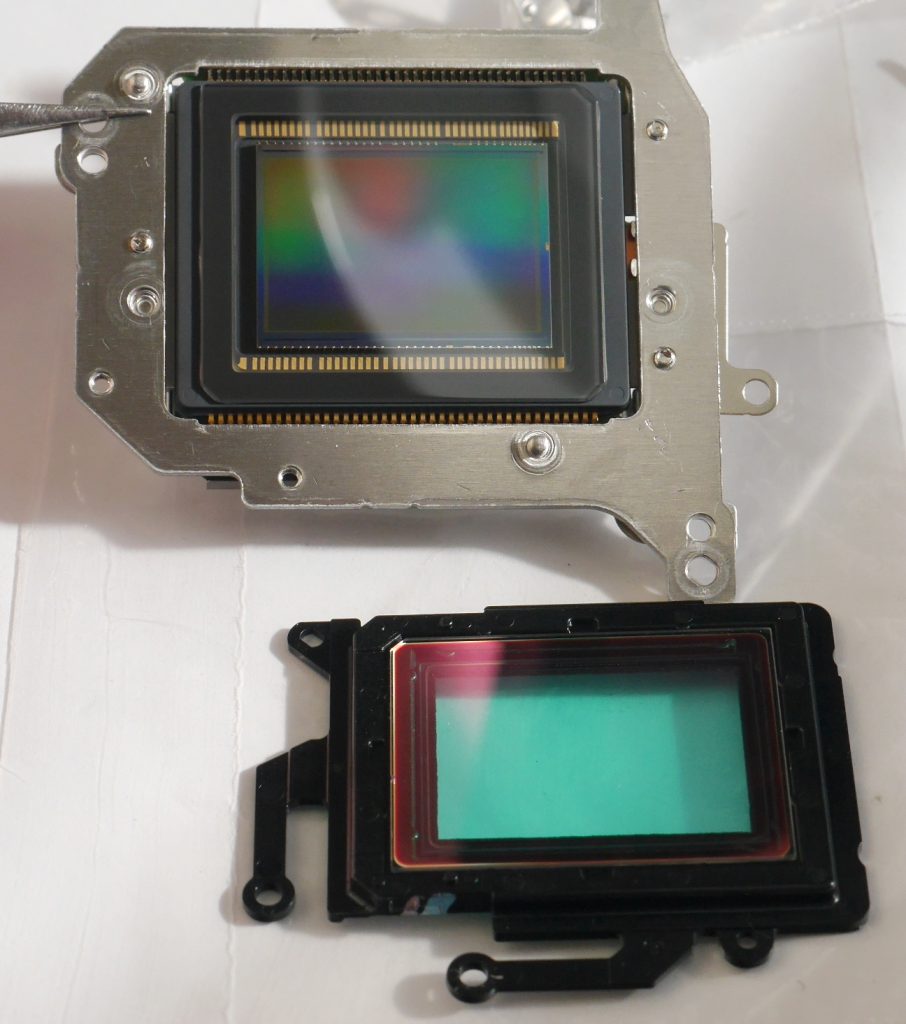
Taking out filters
The plastic part on the sensor is what we after. Sometimes the plastic part is firmly stuck to the sensor so we want to use a hot air gun or a hair dryer.
The hot air gun is also necessary to separate the second filter from the plastic frame. If you using a hot air gun make sure that you hold the frame from a distance as the hot air from hot air gun may be too much heat for it.
You can use a small plastic bag to protect the bottom part of the frame from dust.
On most of those frames there will be glue applied in four points. You may use a small screw driver to separate the glue from the glass.
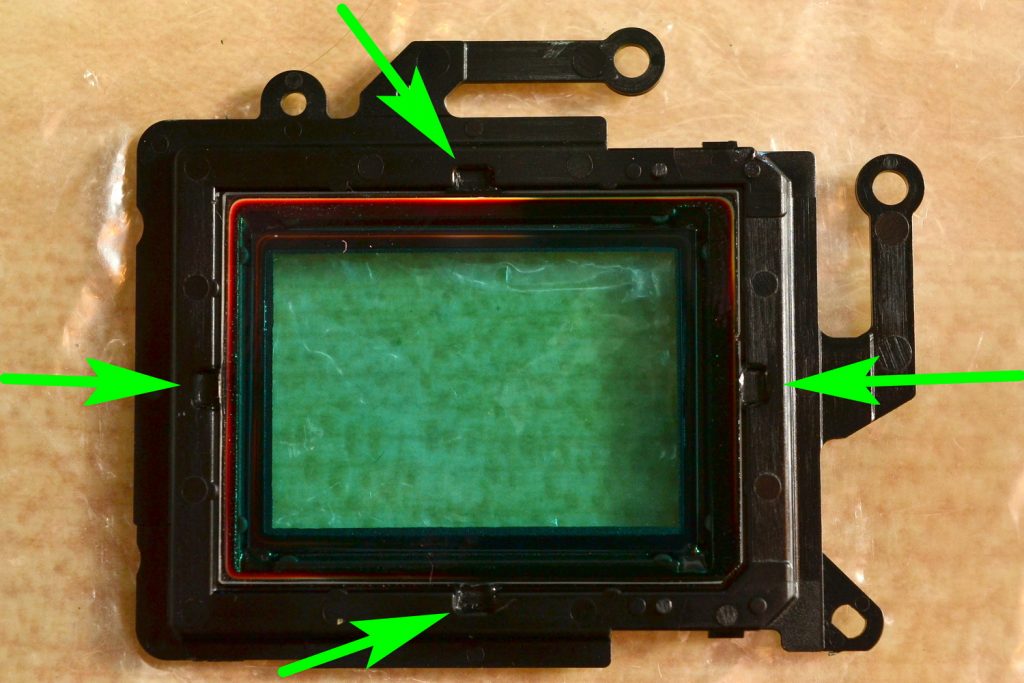
After you heated up the frame a bit, take a small flat screw driver and stick it into the marked corner underneath the glass. The bottom right glass corner will have a mark. You need to start lifting the filter from that corner.
If it does not separate, repeat the heating. The glass will start to slowly lift after you apply some force. Remember, if you go too fast the glass will break.
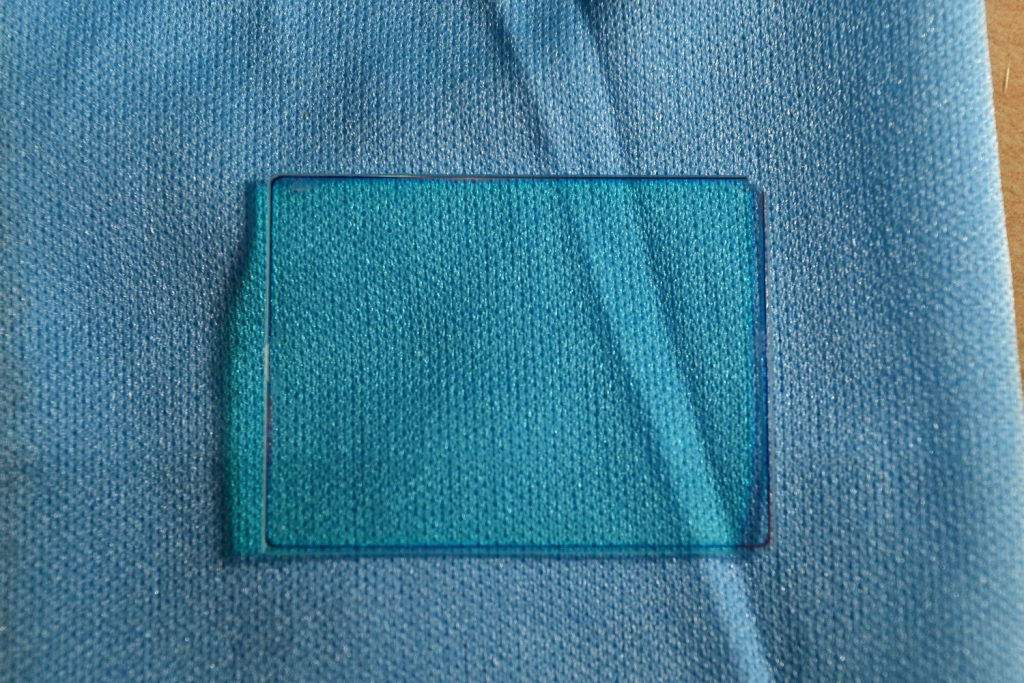
Do not touch filter surfaces with your fingers as marks will be visible. Get a plastic container and carefully place the filter in it. The round container for negative film roll storage works best for this purpose.
After the first filter separation, the same procedure is used for the second filter. This time we can do this faster as the second glass is not needed.
Preparing the filter frame
Now take some double-sided tape for example from 3M and make two strips for the two longer sides. The side with the mark will need the strip cut a bit.
Now measure what length you need for the two shorter sides and cut the tape accordingly. I use a caliper for all these measurements.
Important note. The double-sided tape made of 3M is the best for this conversion. The tape that you can find on AliExpress is not suitable in my experience. It is simply a low-quality product.
Other tapes that I have tested were not suitable. So this is the only tape that can hold the glass firmly and there is no risk that the filter will fall out.
We need to clean the filter. At least one side needs to be cleaned and exactly the side which will be on outside.
If you accidentally touched the filter surface you probably need to clean it.
We will need a dry sensor cleaning swab, lens cleaning liquid and lens cleaning cloth.
The lens cleaning cloth is used in the beginning to clean all the dirt from the surface. Spray on the cloth a bit of a cleaning liquid and clean the filter. Use a LED torch light to see how the cleaning is going. If you want the best quality conversion without dust marks on the image you should work in a dark room and use LED light to catch every dust particle.
Now use the sensor cleaning swab to prepare the filter side which will face the sensor. Keep the plastic frame still separated from the sensor and keep the small plastic bag still attached.
Also use air blower that is used for sensor cleaning.
After making sure the filter has no dust left place the filter in the plastic frame. Try not to touch the glass and adjust it with small plastic pieces (writing pens or small screw driver handles for example).
Remove the small plastic bag and make sure there is no dust inside. Blow a few times with the air blower.
Take the sensor and make sure there is no dust on it. Place the plastic frame on the sensor. You can double check how clean it is right now by pointing to it your LED light from different corners.
Assembling it all together
If it looks clean you can start the assembly. Fit the metal part to it.
Place the sensor in the camera and put in the screws. Now tighten the screws to the position when the sensor is a bit loose.
If you want to adjust the quick focus you should subtract 0.15 from the three length numbers that you have.
Make those three distances as precise as possible.
We need now to secure the three screws. Use some glue, impact glue for example works really well. Any other type of glue will also work as far as it sticks to metal. Hot glue probably isn’t a good idea.
Please do not forget to place the optical cable into its place otherwise the camera may start to give an error.
This is the shiny screw that goes in the hidden place.

Download Our Infrared Photography Guide

- How to take infrared pictures with a digital camera
- What are infrared filters available
- How to process infrared images
- How to modify a digital camera for infrared photography
- How to modify a digital camera to a full spectrum
 Subscribe to our YouTube channel