Here we will turn Canon 600D to astrophotography camera.
We will need here some sort of precise measuring instrument. A simple gauge with a stand would do the job.
If there is no chance to get this tool, we can do a simple trick. The trick to level the sensor may work in most cameras. However, we will lose the precise quick focus. But who needs quick focus in astro camera.
Unscrew all the outside screws. Remove the rubber covers on the left side and a small cover next to the LCD. The rubber grip cover of the right hand does not need to be removed. Unscrew all the screws that are underneath those covers.
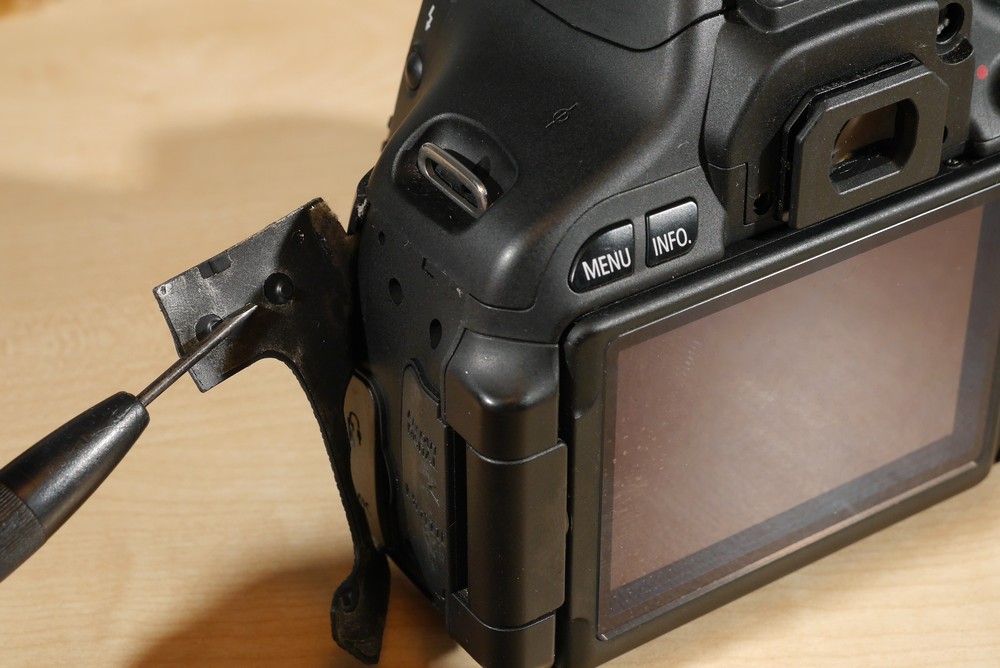
Start from the back panel first. Carefully separate the panel from the camera. There will be one cable to disconnect. It has a metal plug. Use a small flat screw driver and get underneath the right side and left side of the plug. Carefully lift its corners and unplug the cable. If you pull on the wire a small wire can snap and the LCD will stop working. Also unplug the ribbon cable that goes to the buttons.
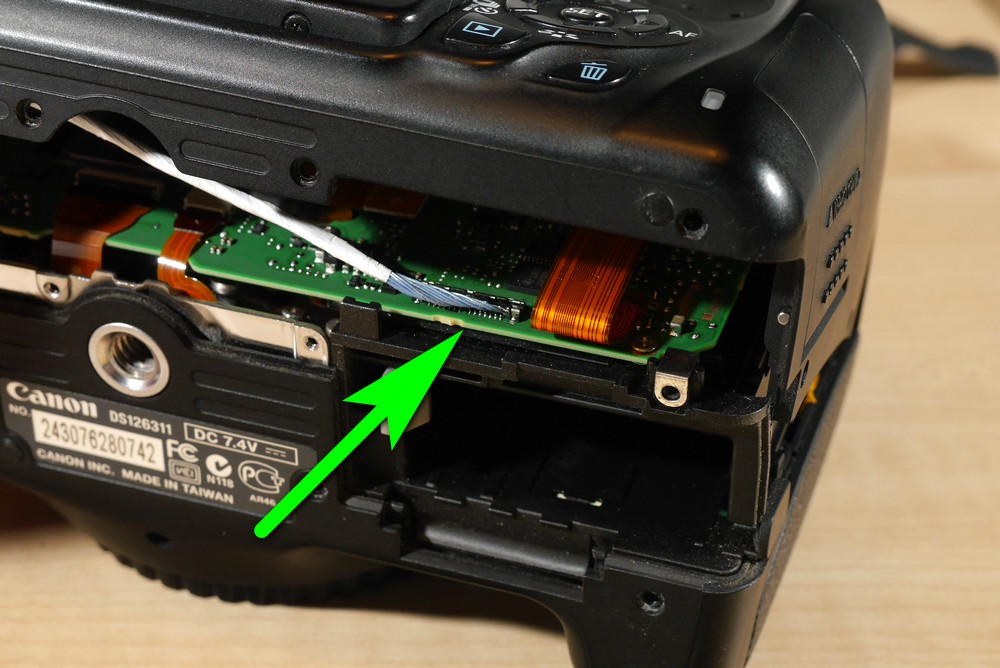
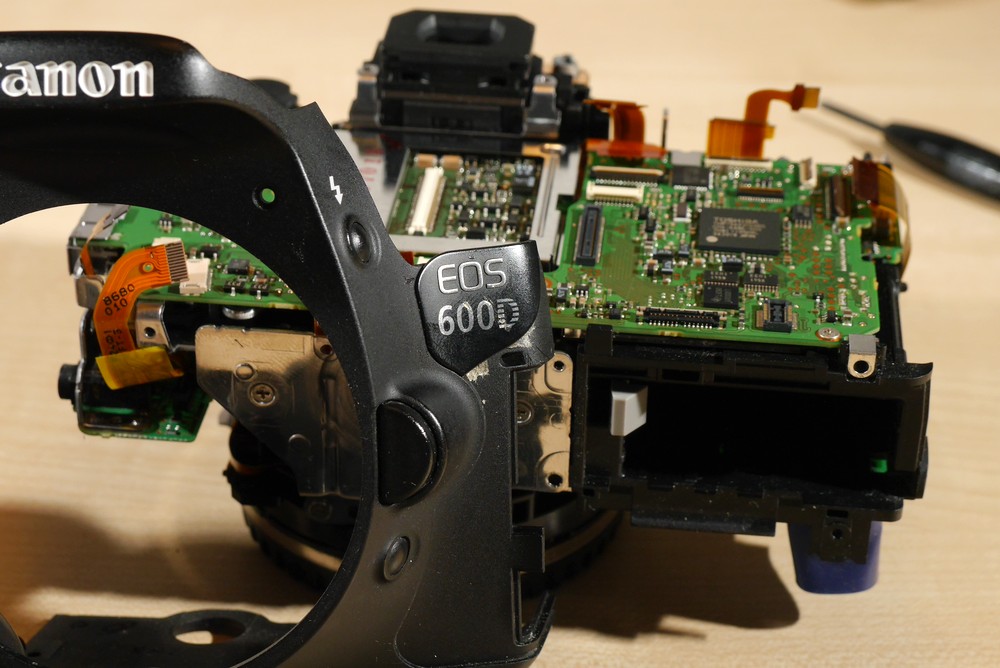
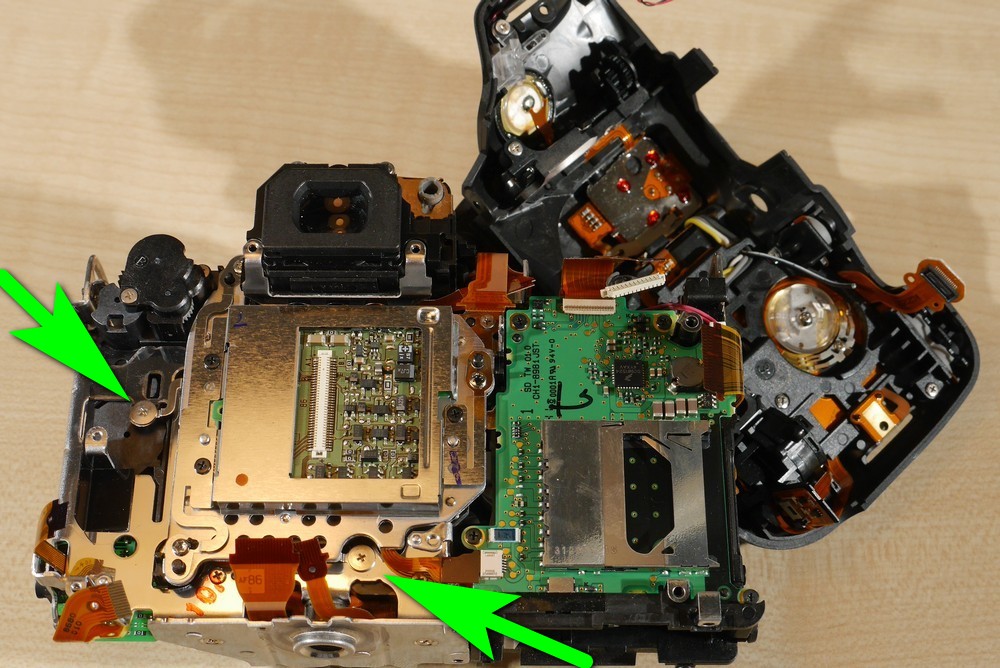
Here is the inside view. Disconnect all the ribbon cables. Some of them will have a simple socked that cable is pushed in. Some ribbons will have a socket with a tiny latch. You need to open the latch first and then pull the cable.
Take out the black plastic piece that is on the left side.
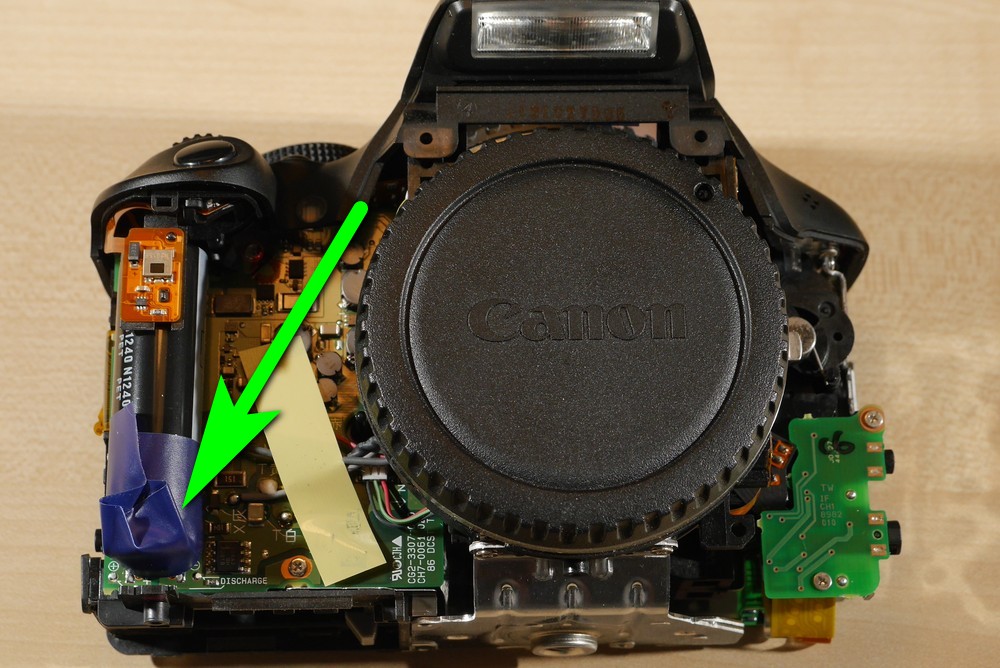
Remove the front panel. Get a piece of electric insulation and cover the flash capacitor. The flash capacitor retain charge for a long period of time and tends to zap us when its not expected.
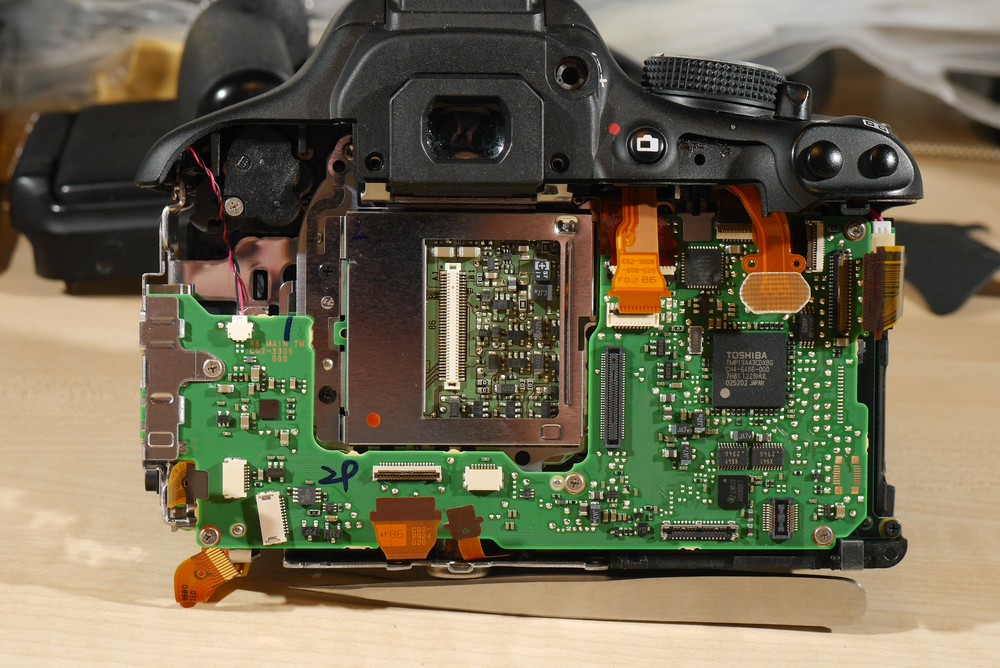
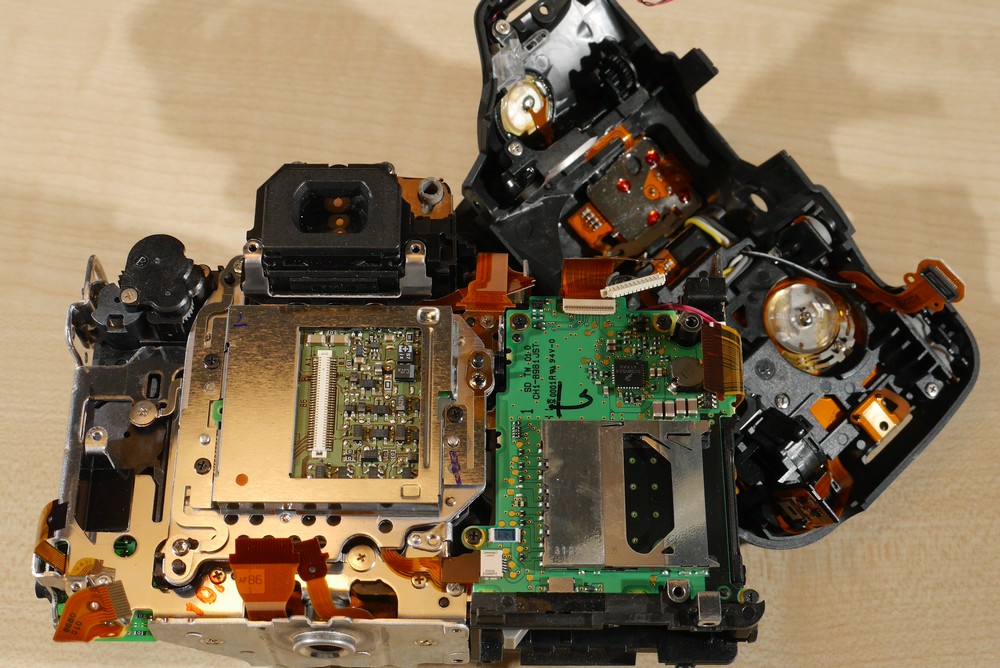
Take out the logic board.
Separate the top part. It will be still attached to the camera with a few wires. That’s fine; we will manage to work with it.
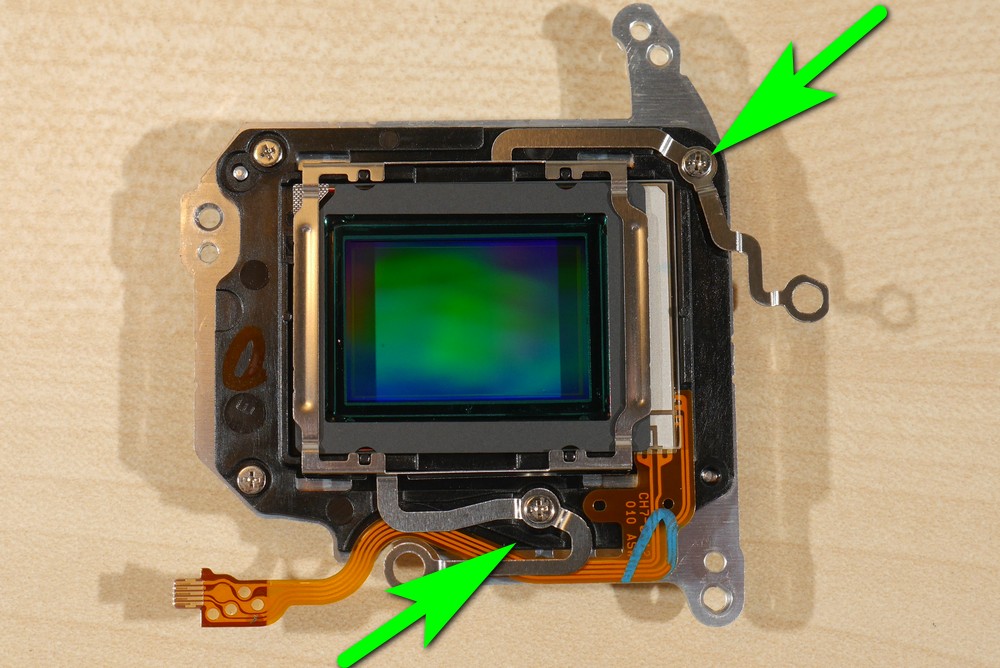
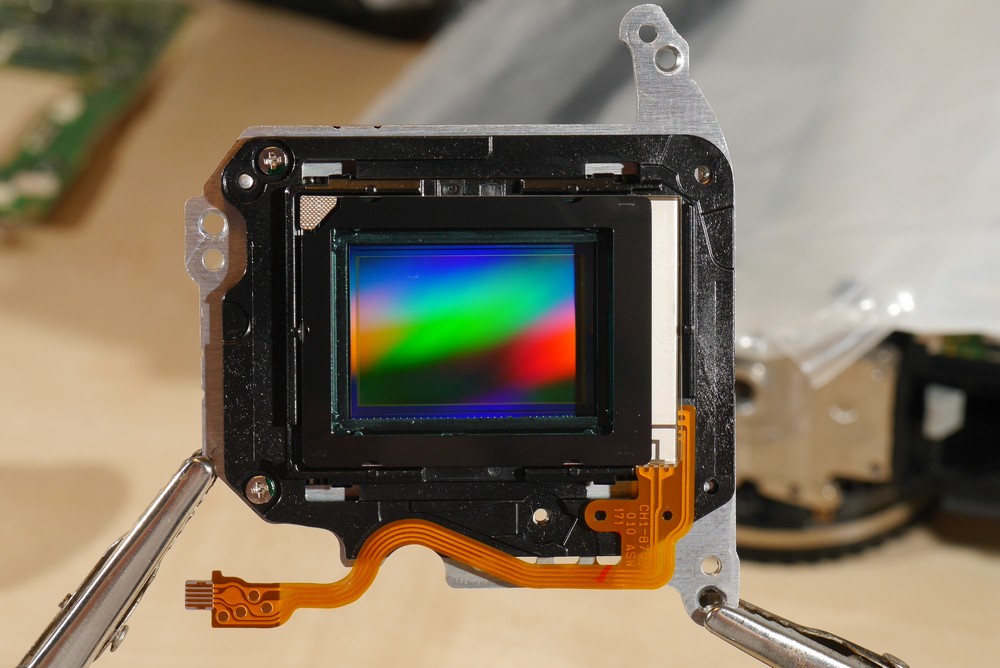
If you have a tool that I was talking about measure sensor distances in three point. The three points are anywhere near the three sensor screws.
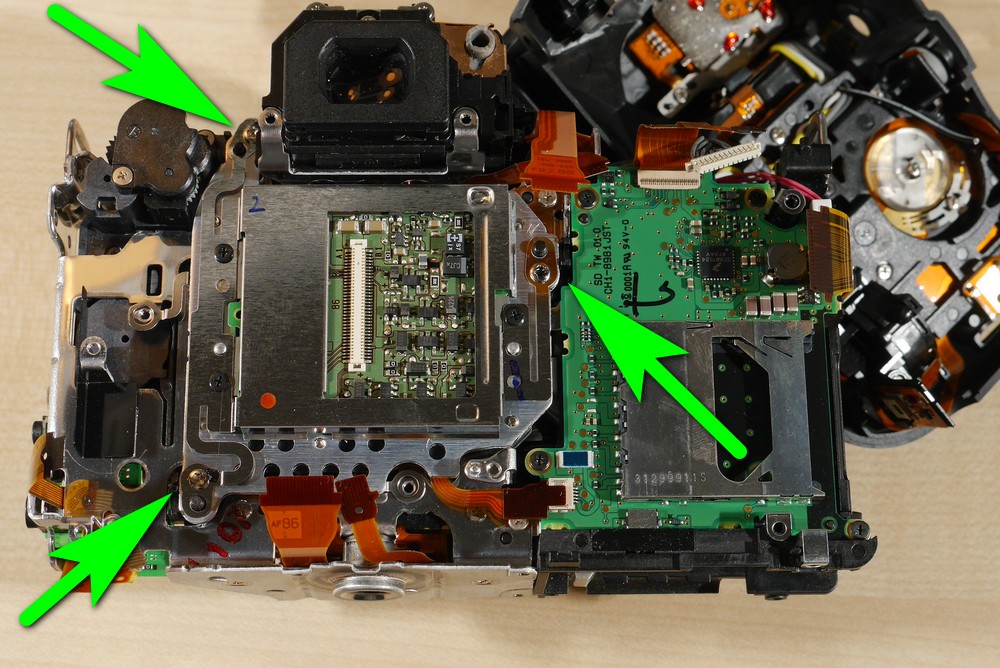
Write down those readings.
Unscrew two sensor screws that are Philips type. Unscrew three torx type sensor screws and take the sensor out.
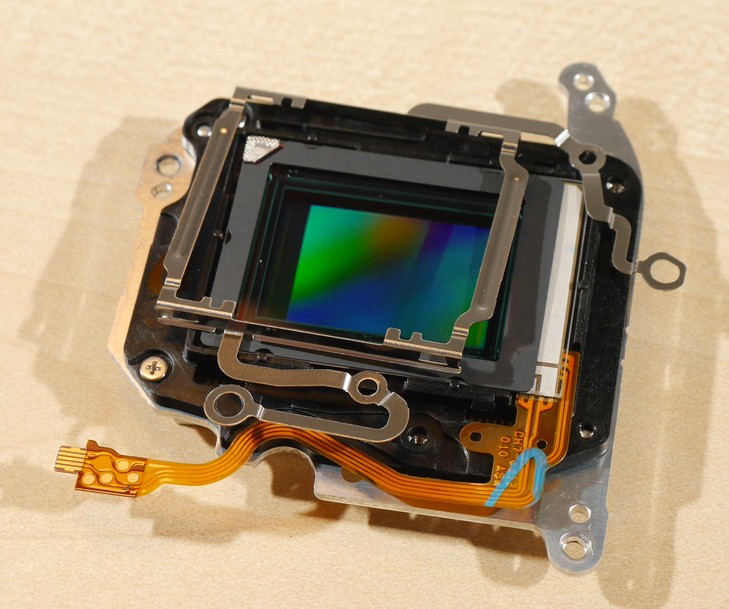
Unscrew the two screws that hold the thin metal frame in place. Take out that metal frame.
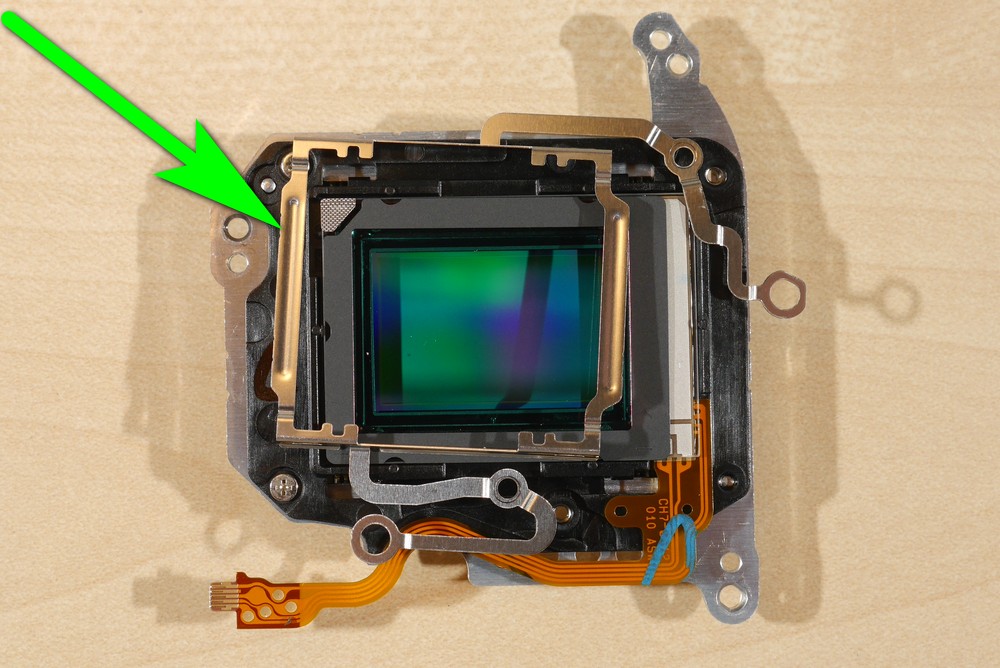
Take out the first filter and place it carefully in a plastic container. Try not to touch its surfaces with fingers. We will need to place this filter back onto the sensor.

Unscrew the two screws that hold the black plastic frame. Separate the frame from the sensor.
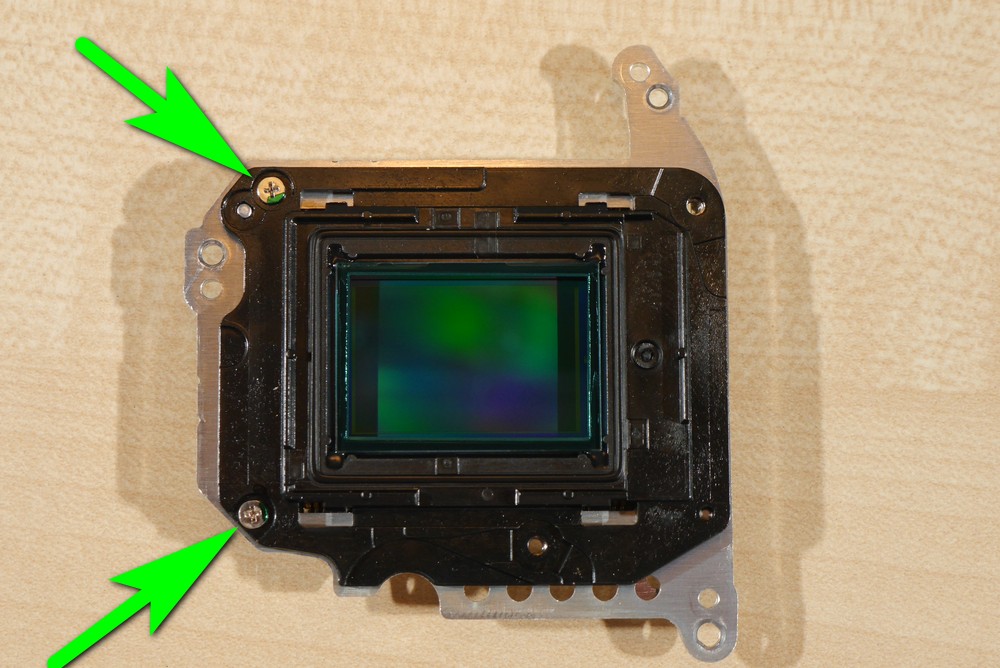
Place the sensor back into the camera. Do not touch sensor surface with fingers.
Use a hot air gun or a hair drier to separate the second filter from the frame.
Clean dust from this plastic frame with air blower or photo brush.
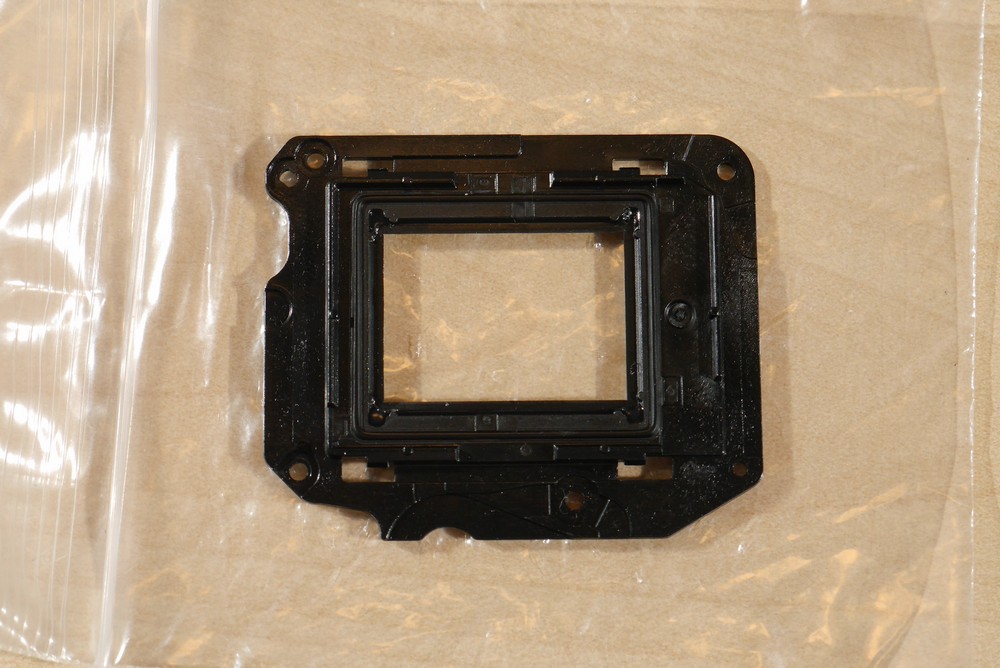
Place the frame on the sensor. Try to have the sensor standing vertically to prevent dust dropping on the sensor’s surface.
Use a LED flash light to inspect sensor and blow out the dust if necessary. Try to hold all those parts by corners or sides.
Take the filter and inspect it for dust with flash light. If you were careful the inside surface will be clean and it’s ready for placing on the sensor in the black frame.
Fit the small metal frame and screw in four screws.
Get a sensor cleaning swab and clean the filter. Usually the outer filter surface will have dust and dirt particles. Use photo air blower if necessary. Avoid using brush on filter or sensors as it leaves marks. The photo brush is okay to use on plastic or metal parts.
Double check everything, use flash light to inspect filter surface for dust. Very tiny dust particles that the sensor swab is leaving most likely will have no effect.
Place the sensor into the camera. Fit in the three sensor screws.
From the three numbers that we have subtract 0.15 mm. With the gauge adjust the sensor distances according those numbers.
If you do not have any measuring tool, we will sacrifice the quick focus and simply tighten those three screws.
When we tighten the screws the three springs will serve as our spacers. Usually the sensor will be positioned correctly. If some astro images will be out of focus in one corner that means, we will need to level the sensor with a measuring tool.
Use glue (not super glue) and put it on the three screws. This will stop them from turning and we still can unscrew them if needed.
Put the camera together.
Download Our Infrared Photography Guide
- How to take infrared pictures with a digital camera
- What are the infrared filters available
- How to process infrared images
- How to modify a digital camera for infrared photography
- How to modify a digital camera to capture full spectrum images.
 Subscribe to our YouTube channel