
Here we will turn Canon 1300D to a Full Spectrum Camera. The process for converting the Canon 1300D to a Full Spectrum Camera is very similar to that for the Canon 1200D. The 1300D has a few additional ribbon cables for its WiFi and NFC.
As with the older model, we will need some sort of tool to level the sensor. However, if we do a full spectrum conversion, we may be able to level the sensor by tightening the three sensor screws.
Disassembly
Unscrew all the outside screws. There will be one hidden screw underneath the rubber grip.
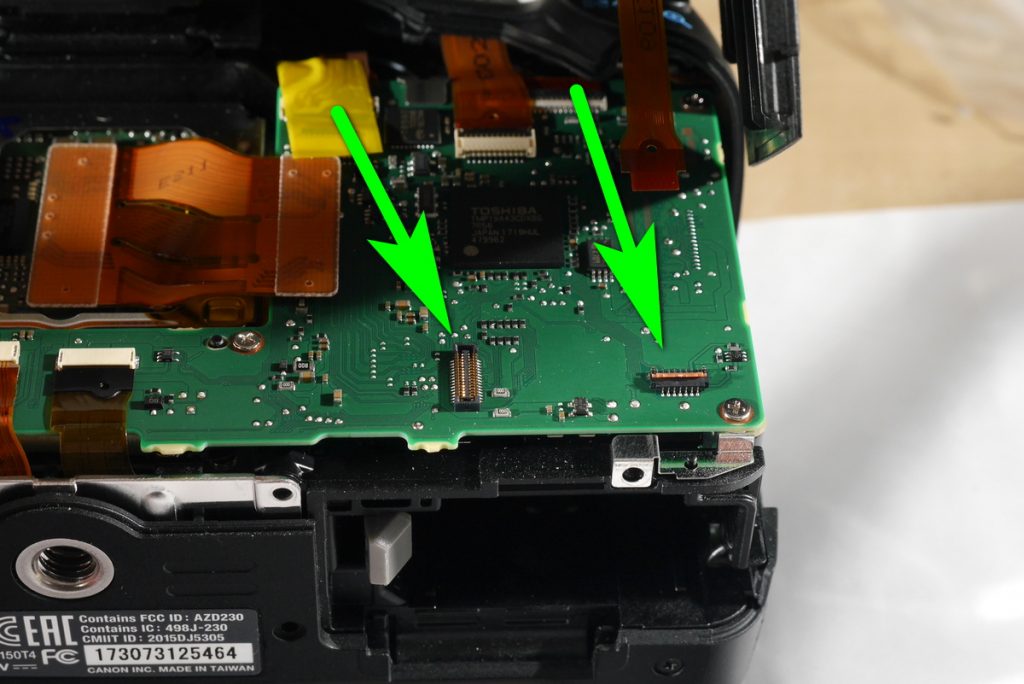
First separate the back panel with the LCD. Be careful because there are two ribbon cables to be disconnected.
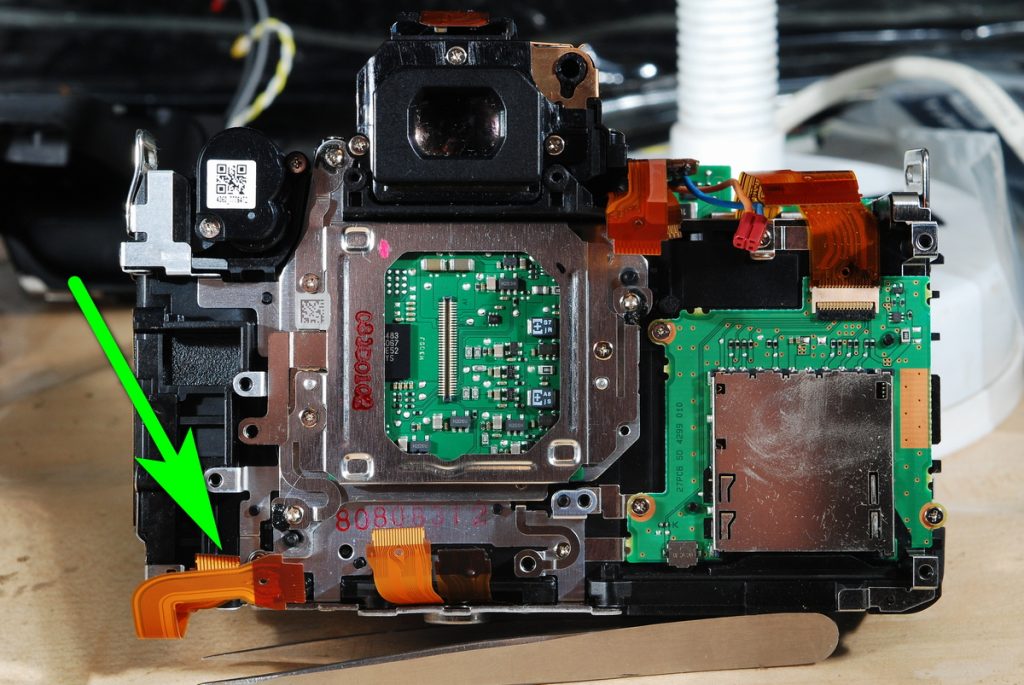
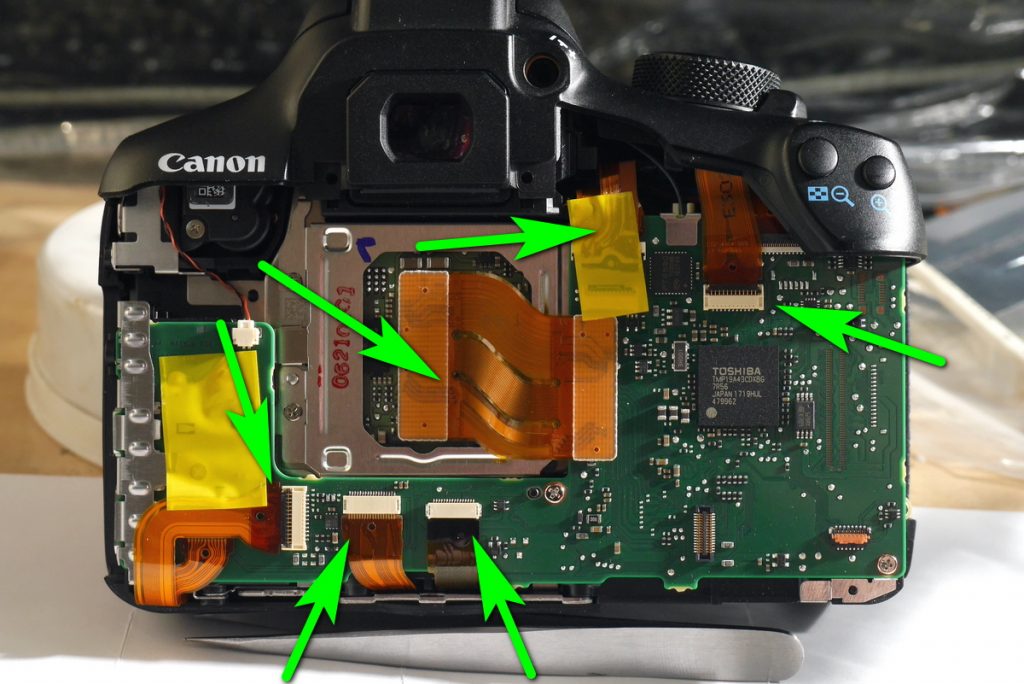
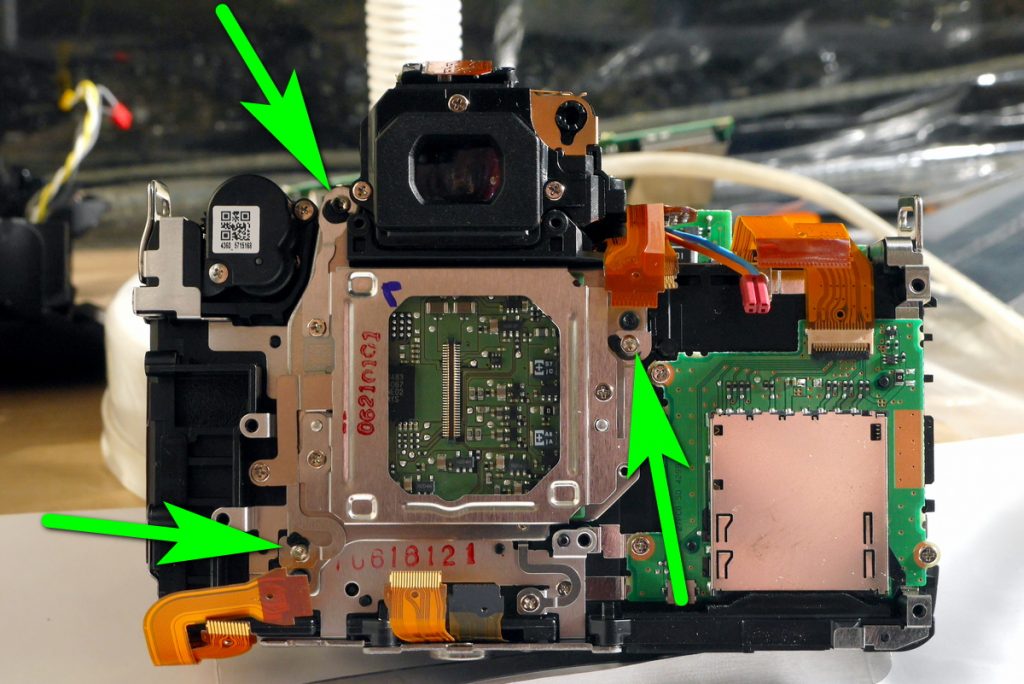
Now you will need to disconnect all the ribbon cables, disconnect the sensor cable.
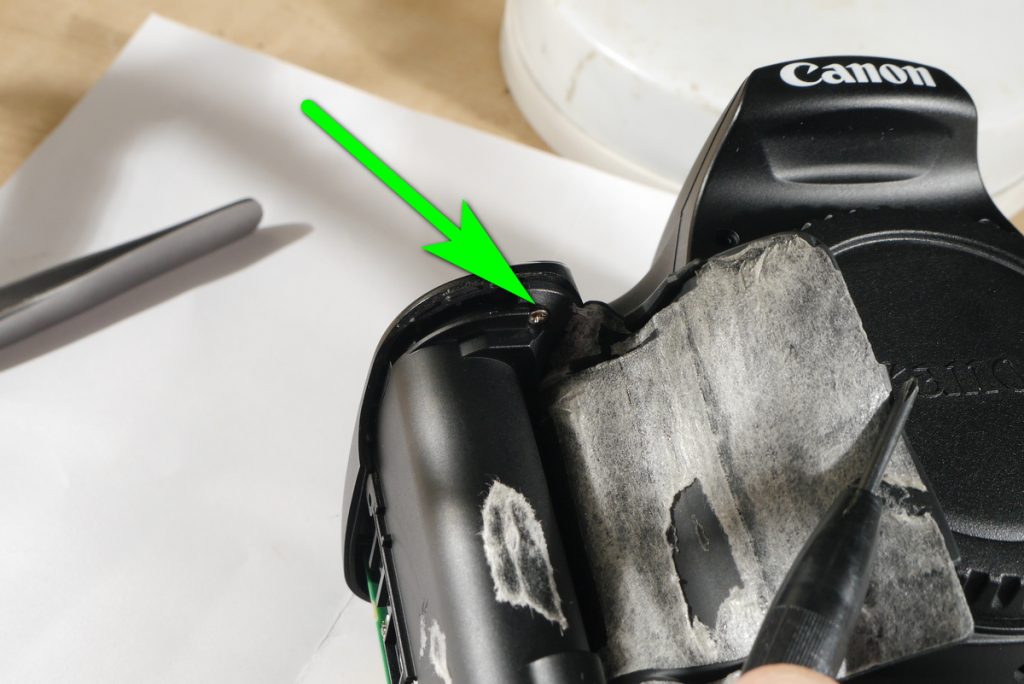
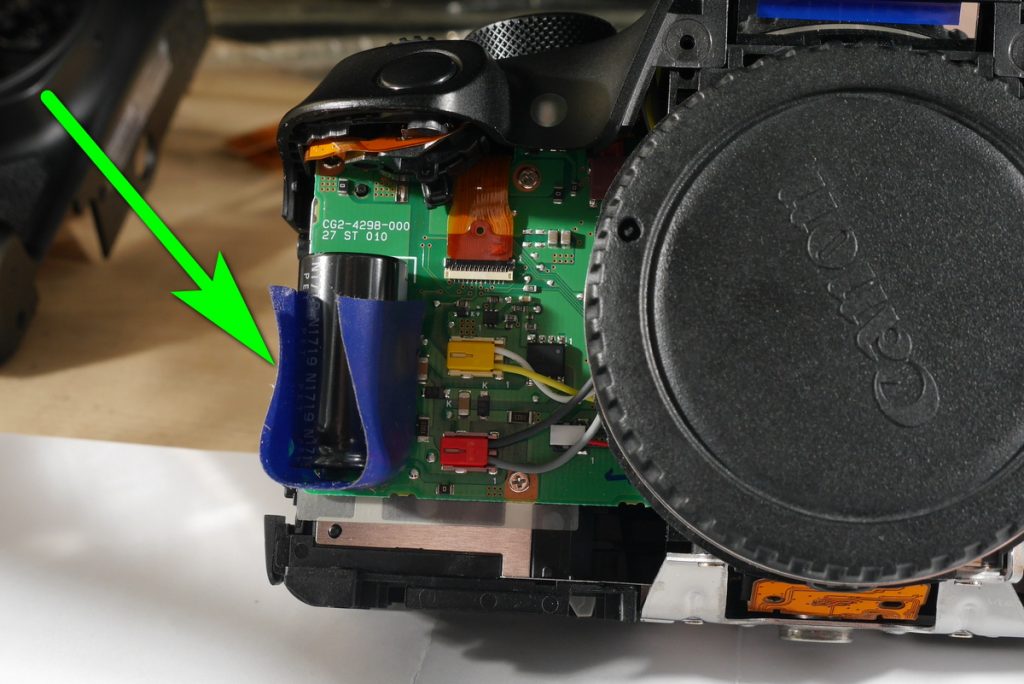
Take out the front panel. You will see a flash capacitor.
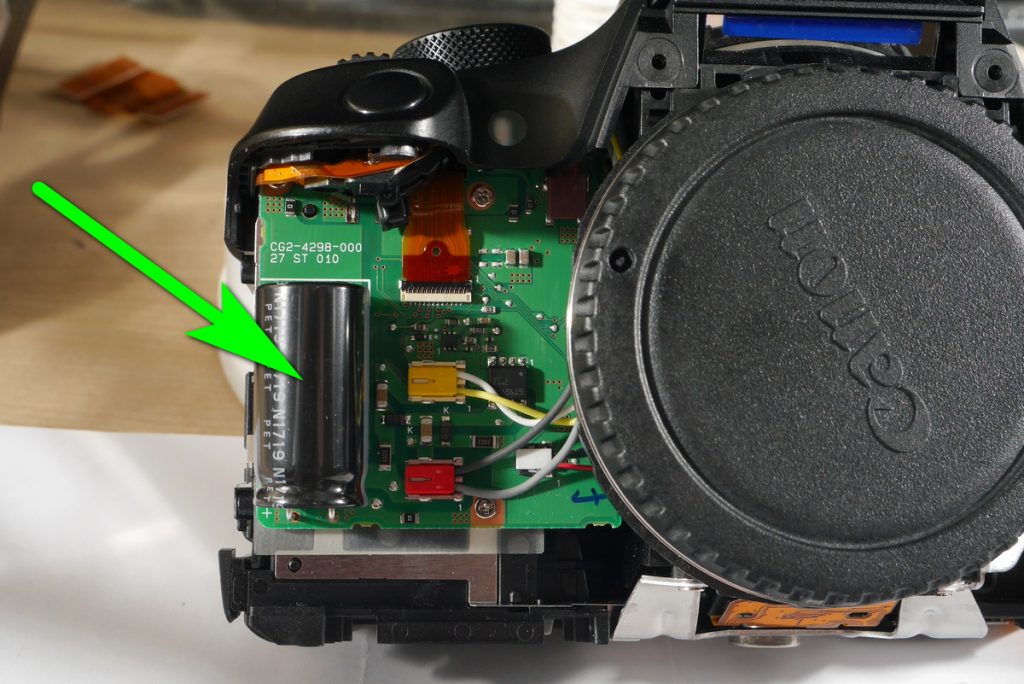
Take a piece of insulation and cover the two wires of the capacitor. This will prevent you from accidentally touching it.
Disconnect both flash cables: the red one and the yellow one. Please do not mix them when assembling the camera.
The best way to do this conversion is to use some sort of tool to measure the distance between the sensor and the camera chassis.
For this purpose you could use a caliper or a gauge with a magnetic stand.
Calibration
In this conversion we will need to move the sensor by 0.3 mm to the front. Usually this sensor position is right at the distance so it can move to the front. If you don’t have any tools, you can simply tighten the three screws to try and level the sensor.
In case you have some part of image not in focus when taking astro images you will need to get the above-mentioned tools to level the sensor.
Before starting, clean your table and the surrounding area with a dust cleaner or a microfiber cloth.. This will lower chances for dust to get onto the sensor.
To remove the filter, use a very small flat screwdriver. Stick it between the metal part and the plastic frame and turn it slightly. The separation usually starts after some time and eventually all the frame separates.
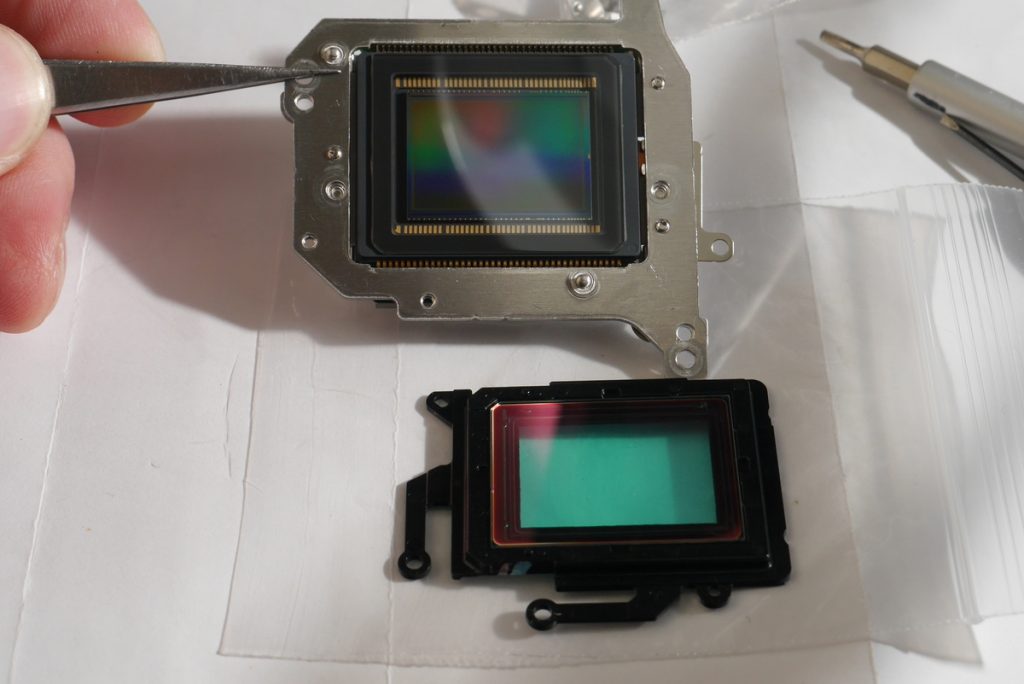
If the frame does not want to separate use hot air gun or hair dryer to heat it up slightly.
After separating the frame, put the sensor back into the camera. We will not do anything to it. You can store the frame in a plastic bag. The front filter can be used when converting other cameras to astro photography.
That’s is basically it. We just need to level the sensor or screw the three screws tight and assemble the camera.
There should be enough space to move the sensor to the front. I never had a Canon 1300D camera that I would need to file down some metal to make the sensor shift properly.
On other cameras this is not always the case. For example, on Panasonic G2 you will need to file down a bit the three metal pillars.
Download Our Infrared Photography Guide
- How to take infrared pictures with a digital camera
- What are infrared filters available
- How to process infrared images
- How to modify a digital camera for infrared photography
- How to modify a digital camera to a full spectrum
 Subscribe to our YouTube channel